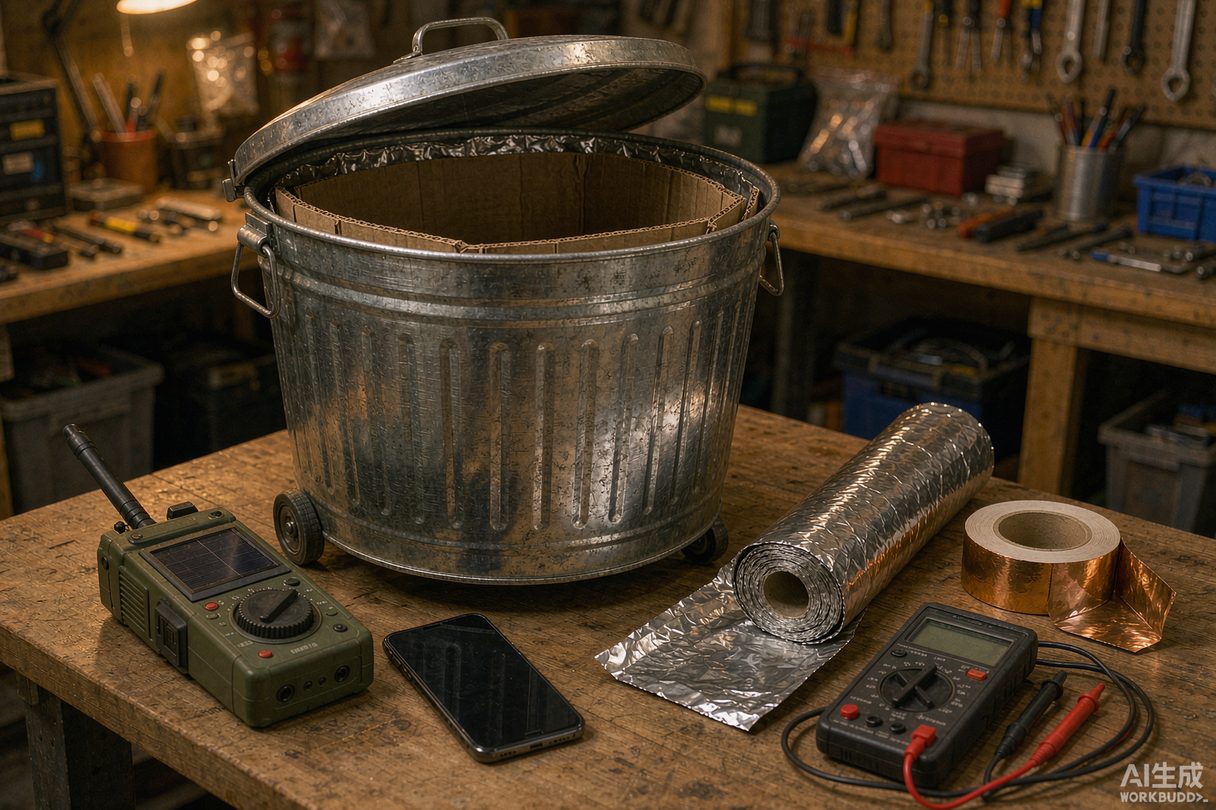
Why you need a Faraday cage
In May 2024, NOAA issued its first G5 — extreme — geomagnetic storm watch in nearly two decades. The storm lit up auroras as far south as Florida, but it also disrupted GPS-guided farm equipment, degraded satellite operations, and reminded grid operators how exposed modern infrastructure is. That storm passed with limited damage. A stronger one, like the 1859 Carrington Event, would not.
Two real threats can damage the electronics you depend on. The first is a severe solar flare and coronal mass ejection — a natural event NOAA monitors around the clock. The second is an electromagnetic pulse (EMP), a burst of electromagnetic energy that can induce damaging currents in anything with a circuit board. Both are low-probability events, but the protection is cheap: roughly $30 of materials shields $3,000 worth of radios, hard drives, and backup phones.
There is also an everyday reason to care. Thieves now steal push-to-start cars with relay attacks — one device amplifies your key fob's signal from inside your house while an accomplice unlocks the car in your driveway. A small Faraday box for your key fob stops the attack completely, and it takes ten minutes to make. And while you are hardening your home against grid failures, remember the most common one: severe storms. The same preparedness that covers a blackout should cover what storms do to basements — see our tested sump pump picks for basement flooding.
As an Amazon Associate, StormRift.net earns from qualifying purchases.
The 3 easiest DIY Faraday cage methods
All three methods work on the same physics: a continuous conductive shell with no gaps, plus an insulating layer so your devices never touch the metal. They differ in cost, durability, and how much they can hold.
| Method | Difficulty | Cost | Protection | Best for |
|---|---|---|---|---|
| Aluminum Foil + Cardboard Box | Very low | ~$5 | Basic | Car key fobs, phones, temporary shielding |
| Metal Trash Can | Low | ~$30 | Medium-high | Bulk home electronics protection |
| Ammo Box | Low | ~$20 | High | Portable kits and long-term storage |
Materials you'll need
Every link routes you to the correct regional Amazon store automatically. Total cost for the trash can method — the one we recommend for most households — runs about $30–45 including the multimeter you will reuse for years.
| Material | Used for | Typical price | Buy |
|---|---|---|---|
| Galvanized steel trash can (20 gal, tight-fitting lid) | Method 2 — the cage body | ~$25–35 | Amazon |
| Military surplus .50 cal ammo can | Method 3 — the cage body | ~$15–25 | Amazon |
| Copper foil tape (EMI shielding) | All methods — sealing seams | ~$8–12 | Amazon |
| Heavy-duty aluminum foil | Method 1 — the shielding layer | ~$5–8 | Amazon |
| Digital multimeter (continuity test) | Testing your cage | ~$15–25 | Amazon |
| Rubber mat liner roll (1/8 inch) | Insulation layer — all methods | ~$10–15 | Amazon |
As an Amazon Associate, StormRift.net earns from qualifying purchases. Prices are typical street prices and change frequently.
Method 1: Aluminum foil + cardboard box (the simplest)
This is the ten-minute version. It is ideal for car key fobs, a spare phone, or any small device you want shielded without buying anything special.
- Line the box with cardboard as insulation. Your device must never touch the conductive layer directly — a gap of cardboard or foam is what keeps the shield from coupling energy straight into your electronics.
- Wrap the entire box in 3+ layers of heavy-duty aluminum foil. Overlap each sheet generously and check for tears. One layer has too many micro-gaps; three is the practical minimum.
- Seal all seams with conductive tape. Copper or aluminum foil tape turns overlapping sheets into one continuous shell. Regular packing tape does not conduct — it breaks the cage.
- Create a lid that overlaps by at least 2 inches on all sides. The lid-to-body junction is where every DIY cage fails first. A generous overlap keeps the gap sealed by pressure and contact area.
- Test with a multimeter. Set it to continuity mode and touch one probe to the lid and one to the body. A beep means the shell is electrically continuous — exactly what you want.
Best for: car key fobs, small electronics, and temporary use. For anything larger or long-term, move to Method 2.
Method 2: Metal trash can (the best home solution)
A galvanized steel trash can is the sweet spot: big enough for a laptop, a radio, hard drives, and a solar charger, cheap enough to buy two, and rigid enough to live in your garage for a decade.
- Choose the right can. Galvanized steel with a tight-fitting lid — and not plastic-lined. Some cans have a plastic coating inside that insulates the lid from the body and silently breaks the cage. Bare metal only.
- Line the interior with rubber mat or cardboard. Cover the bottom and walls completely. Devices must never touch the metal directly — contact creates a path for induced current straight into your electronics.
- Place devices inside. Wrap fragile items individually. Keep spacing so nothing presses against the walls.
- Seal the lid-rim gap with conductive tape. Run a band of copper or aluminum foil tape around the rim where the lid meets the can. This is the single most important step in the whole build.
- Test continuity between lid and can body. Multimeter probes on lid and body — a beep confirms the shell is continuous.
Best for: laptops, backup hard drives, solar chargers, and radios. A hand-crank NOAA unit like the Midland ER310 is one of the smartest things to cage — see our full review of the best emergency radios for picks worth protecting.
Method 3: Ammo box (the most durable, military-grade)
Genuine military surplus ammo cans were built to keep ammunition dry in combat conditions. The rubber gasket that seals out water also helps seal the lid seam — which is why ammo cans are the longtime favorite of the preparedness community.
- Source a genuine military ammo box. A .50 cal can is the classic size. The rubber gasket in the lid gives you a head start on electromagnetic sealing that no plastic box can match.
- Remove any paint from the lid-rim contact area. This is the step everyone skips, and it matters: paint is an insulator. The lid must touch the body metal-to-metal. Sand the contact surfaces until you see bare steel.
- Add a cardboard liner inside. Same rule as always — devices never touch the metal shell.
- Fill and close. The rubber gasket compresses and does the sealing for you. Latch it firmly.
- Optional: add a desiccant pack for long-term storage. A sealed steel can traps humidity. A rechargeable silica pack keeps hard drives and radios corrosion-free for years.
Best for: portable kits, vehicle storage, and long-term storage. It is the method we would trust in the back of a truck.
How to test your Faraday cage
An untested cage is a guess. Run these three tests when you build it — and repeat them every few months, because tape lifts, gaskets age, and foil tears.
Multimeter continuity test
Set your multimeter to continuity mode. Touch one probe to the lid and one to the body at several points around the rim. You should hear a beep everywhere. A silent spot marks a gap — seal it with conductive tape and test again.
AM/FM radio test
The most convincing test you can do at home. Tune a portable radio to a strong local station, turn the volume up, and place it inside the sealed cage. Complete silence — or near-total signal loss — means the cage is working. If you still hear the broadcast clearly, find the gap.
Phone test
Put your phone in the cage, close it, and call it from another phone. A working cage sends the call straight to voicemail. Note that modern phones are aggressive about finding signal, so this test is stricter than what an EMP demands — a ring does not automatically mean your cage fails, but silence is definitive proof it works.
Whatever you do, do not build one cage and never test it again. Add a re-test to the same calendar reminder as your smoke detector batteries.
Common mistakes to avoid
- ❌ Using a plastic trash can. Plastic does not conduct. It shields nothing, no matter how tight the lid.
- ❌ Letting devices touch the metal directly. Contact creates a path for induced current and defeats the cage. Always insulate.
- ❌ Forgetting to seal the lid. The lid seam is where cages fail. An unsealed gap is an open door for electromagnetic energy.
- ❌ Using torn or holey aluminum foil. Every tear is a leak. Inspect each layer before you add the next.
- ❌ Thinking one layer is enough. For the foil method, three layers is the minimum. More layers cost pennies and add real margin.
FAQ
What is a Faraday cage and how does it work?
A Faraday cage is an enclosure made of conductive material that blocks external electromagnetic fields. When an electromagnetic pulse hits the cage, the conductive shell redistributes the charge around its exterior, canceling the field inside. The physics works at any scale — a foil-wrapped box and a metal trash can follow the same principle as the shielded rooms used in electronics labs. What matters is complete conductive coverage with no gaps, and insulation so your devices never touch the conductive shell.
Can I use aluminum foil to make a Faraday cage?
Yes — aluminum foil is a legitimate shielding material, and it is the cheapest way to build a working cage. The keys are layers and seams: use at least three layers of heavy-duty foil with no tears, overlap every seam, and make sure the lid overlaps the body by at least two inches on all sides. Foil cages are best for small items like key fobs and phones. For laptops, radios, or long-term storage, a rigid metal container (trash can or ammo box) is more durable and reliable.
Does a Faraday cage need to be grounded?
No. This is one of the most common misconceptions. A Faraday cage shields by redistributing charge across its conductive surface — it does not need a path to earth to work. Grounding matters for large fixed installations like shielded server rooms, but a trash can or ammo box sitting on your garage floor protects its contents just fine. What actually matters is continuous conductive contact around the entire enclosure, especially at the lid.
What should I put in a Faraday cage?
Prioritize devices that are hard to replace and useful in a grid-down scenario: a hand-crank or NOAA emergency radio, a spare phone, a laptop or tablet with downloaded maps and documents, backup hard drives or USB sticks with important files, a solar charger, and a car key fob for push-to-start vehicles. Wrap sensitive items so nothing touches the metal walls directly, and add a desiccant pack if you plan to store the cage long-term.
Will a microwave work as a Faraday cage?
No — this is the most widespread myth on the internet. A microwave oven does contain a Faraday cage, but it is engineered to block one specific frequency: 2.4 GHz, the frequency the magnetron cooks with. EMP and geomagnetic disturbance energy spans a much wider range of frequencies that pass straight through the door mesh and seams. Tests with radios and phones inside microwaves routinely show signal leaking in. Build a real cage from foil, a trash can, or an ammo box instead.
Final verdict: which method should you choose?
Most households should build the metal trash can: it holds everything that matters, costs about $30, and survives a decade in the garage. If you need something portable — for a vehicle kit or long-term storage — choose the ammo box. And if all you want is to stop relay thieves from stealing your car tonight, the foil box takes ten minutes and costs almost nothing.
Whichever you build, test it. A cage you have verified with a radio going silent is preparedness. A cage you have never tested is a decoration.
As an Amazon Associate, StormRift.net earns from qualifying purchases.
As an Amazon Associate, StormRift.net earns from qualifying purchases. Product links route through StormRift's regional redirect and open the correct Amazon store for your location. Prices and availability were checked at publication and can change.